
Fitbit app for PC is one of the most exemplary health and fitness applications available in the Windows Store right now, and there are only positive things to say about it. Still, this post is about the desktop program that allows you to set up a new Fitbit device or synchronize with the wireless dongle.
Because its primary purpose is to transmit data to Fitbit’s computers, the software isn’t too complex or feature-rich. The touch version, as well as other mobile applications, may be used in the same way.
It’s straightforward to connect a new Fitbit gadget to Fitbit’s servers; all you have to do is download the free software. At present, you can synchronize data from the Force, Flex, One, and Zip devices.
I have a lovely old Zip of my own, and I’m pretty happy with its capabilities. After using Fitbit Connect for PC, I can attest that the program is faultless and performs exactly what it should.
Features of the Fitbit App
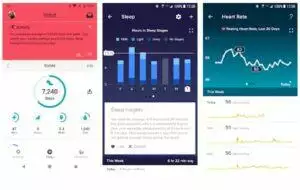
The new Fitbit app for PC has the following features:
- More information and additional notification kinds have been added to the live tiles to help you rapidly access your most important health and fitness statistics so you can better meet your health and fitness goals.
- Quick actions to assist you in recording and tracking your healthy living activities, such as food, water consumption, and exercise, as well as setting alarms more quickly with the press of a button to encourage more regular logging.
- Users may utilize Cortana on Windows 11, 10 tablets, PCs, and phones to voice instructions like “Fitbit, I ate chicken for supper” or “Fitbit, I went for a three-mile run” to automate and simplify food and activity tracking.
- All your alerts and messages have been consolidated into a single tab in the notification center. This makes it much easier to keep track of your progress and remains inspired by the shouts, insults, and encouragements you get from friends and loved ones.
- Improved Bluetooth synchronization across all your Windows 10 devices with compatible hardware gives you faster access to your health and fitness data, allowing you to make more timely choices to achieve your goals.
- Design and continuity support for all Windows 10 devices make it easy to customize and see all of your most critical personal data in real-time with an improved visual experience.
How to Install Fitbit App for PC
Step 1: Download and Install Fitbit for PC Windows 11/10 Guide
Like any other program, Fitbit must be downloaded and installed before it can be used on your Windows 11, or 10 computer. This is a simple task. To do so, follow the procedures outlined below.
- Start your Windows 11 or 10 computer or laptop.
- To begin, open a web browser.
- Go to the Fitbit official website.
- Select Download from the Windows Store from the drop-down menu.
- In the Windows Store interface, click the free button.
- Allow time for the Download to complete.
- Install the software.
- Done!
The downloaded installer package should install itself automatically, but if your computer has limitations that prohibit this, open the freshly loaded installer package and click to install it manually. Proceed to the following step after the installation is complete.
Step 2: Sign Up for a Fitbit account on Windows 11 or 10
After you’ve installed the Fitbit app, you’ll need to set up an account on your computer. While you’re at it, charge your Fitbit so you’ll be able to sync it right away after that. To establish a Fitbit account for Windows 11 or 10, follow the instructions below.
- Open the Fitbit application on your PC. This may be done from the Desktop or the Start menu.
- Join Fitbit by clicking the button.
- To choose your tracker, click it.
- Set up by clicking the Setup button. At this point, you do not need to set up your tracker.
- Let’s go!
- To input your birthdate, click the Date button.
- Click the following button to go on to the next stage. The arrow at the very bottom of the application’s display signifies the right path to follow.
- Choose the measurement setup and fill in the required info.
- Click the following button to go on to the next stage. To choose your gender, click on it.
- Click the following button to go on to the next stage.
- Again choose the measurement scale and fill up the weight information.
- Click the following button and fill in the required info.
- Agree to Fitbit’s Terms of Service, and click the following button.
- Done!
You may start syncing or connecting your tracker with the Fitbit app for Windows 10 now that it’s ready.

Step 3: In Fitbit for Windows 11/10 PC, connect your tracker to your Account.
The procedures for syncing or connecting a tracker with your Fitbit for Windows 10 app differ depending on the device. The primary methods for doing it on a specific Windows 10 system using Flex are listed below.
- Launch the Fitbit app on your Windows 10 computer.
- To get started, go to Account.
- To set up a new Fitbit device, go to Set Up a New Fitbit Device.
- From the list of devices, choose your tracker.
- Set up by clicking the Setup button.
- Click next to continue after reading the terms of service. You’re looking for the downward-pointing arrow at the bottom of the page.
- There may be a few more pages to review before the setup is complete. Click the following icons in each of the program windows to complete the pairing.
- To complete setting up your device, follow the on-screen directions.
- Allow setup to complete.
- Done!
You Might Also Like: How To Download Realme Link App on PC?