Running big organizations is a tricky business. Everyone needs to take extra precautions while making critical decisions. One of the most crucial parts of a business is its data. A company relies on its data, which is why it is the need of the hour to have a strong backup of its data.
Even often, storing data on the cloud can be risky at times, so you need to take an extra step and backup their backup for more added security. The 2017 global ransomware attacks affected a large number of industries and resulted in a heavy data loss.
But how is it possible to keep the cloud data safe? How can one backup their already backed-up cloud storage?
The answer is simple; the AOMEI CBackupper is one of those few software that allows a user to backup. In this article, we will write a guide on how to use the AOMEI CBackupper on your computer.
What Exactly Is The AOMEI CBackupper?

The AOMEI CBackupper is an epic backup software that allows its users to upload their cloud storage and other backup files into their cloud database.
This software is a subset of the original AOMEI Backupper program, one of the best redundancy programs. The C in this software’s name stands for Cloud, and it’s pretty explanatory now.
It is not only free software, but it also provides unlimited backing up space, which means that the users can upload as many cloud accounts into it as they want.
For instance, if a user has two free Google Drive cloud storage accounts and a Dropbox one, they can upload it on CBackupper, or even move all of its content to the software.
Moreover, a user can also migrate data from one cloud space to the other. The interface of this app is easy, fun, and engaging.
How To Use AOMEI CBackupper?
To use this fantastic backup program, the procedure is quite simple and straightforward. The user needs to install AOMEI CBackupper on the computer first. Just follow the steps below.
Installing The AOMEI CBackupper
- Go to the computer browser and open it.
- Go to the official website of AOMEI CBackupper.
- The free signup and a free download option will appear on the front screen.
- After that, it is time to download the backup utility.
- Press the download and let it download on the computer.
- After that, go to Downloads and launch the CBackupper installer by double-clicking on it.
- Accept the terms and conditions.
- Let the installer install this backup tool, and it will show the installation complete dialog box once the installation is finished.
- Now it’s time to start using this backup software.
Signing-Up
As already said, this software comes with free signup that lets the users enjoy unlimited cloud storage and the liberty to add as many cloud accounts as they want. To start the sign-up process, here are the guidelines:
- Launch the AOMEI CBackupper app, opt for the free signup.
- AOMEI CBackupper will ask to enter the user’s Email, a password for the cloud, and name.
- After filling the form, press the signup button.
- Now the user has free access to AOMEI CBackupper, and they can initiate the backup process.
Starting A Local Backup
Now that the sign-up process is done, it is time to start a local backup or add backup accounts for redundancy. To start a local backup on AOMEI CBackupper, here is the way:
- As soon as the user signups to AOMEI CBackupper, they will see two options. One is the “Tasks” option, and the other is the “Clouds” option.
- Click on the “New Task” option present in the middle.
- Then go to the source section inside and click on the “Add Source” button.
- The “Add Source” function will allow the users or organization to choose their local files and folders for backup.
- You can also customize the Task Name.
- Navigate towards the lower-right corner and confirm the assigned task so that the local backup starts to take place.
- The user needs to go to the settings for more customization, like setting email notifications for backup and applying filters to specific files.
Uploading Backup To Cloud
The second option is to upload the cloud backup into the AOMEI CBackupper cloud interface. To do that so:
- Open the backup app.
- Sign in with the AOMEI CBackupper username and password.
- After that, click on “Clouds.”
- Find the “Add Clouds” option and press it.
- Add the desired cloud storage space. You can add Google Drive, Dropbox, FTP/SFTP, or One Drive.
- If the user’s choice is One Drive, click on its name and then press OK to authorize CBackupper to use it.
Allocating Free Space
Allocating the free space in AOMEI CBackupper can be helpful for a smooth backup. To use allocation, follow these steps:
- After adding the cloud space, navigate towards the “Allocate” option.
- The Allocate Space option will display some choices.
- Either consume all free space to set as backup file storage or set a portion of it and let the remaining storage unused.
- After configuring the choice, press the OK button.
- The allocation will complete.
Adding Another Cloud Account
Let’s suppose a scenario where the user wants to move their data from one cloud space to another. The person first needs to add another cloud account by repeating the same process mentioned above.
To move data, follow the procedure below.
- Click on the “Tasks” option.
- Then tap the “Add Source” option and choose the cloud from where the data is moved.
- After that, click the “Add Destination” and enter the receiver, and then click ‘OK.’
- You can also set automatic cloud backup in the “Schedule” option. To start the backup, click on “Start Backup,” and the backup files will also migrate to the destination.
Popular Queries
- Is AOMEI CBackupper sign-up free?
Yes, it is free. Make sure that you use a valid email address.
- Is it safe for my computer?
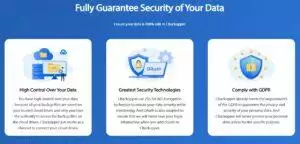
Yes, the developers are AOMEI which is a reliable company.
- Can they provide an unlimited backup?
Yes, it provides unlimited free backup.
Conclusion
This is truly fantastic for large organizations that do not want to lose their essential data in mass cyber thefts. A little extra measure wouldn’t cost anyone much. Now that you learn how to use the AOMEI CBackupper, make sure you backup your files so you can always have your files secure.
You Might Also Like: How To Use MBackupper App And Backup Your iPhone, iPad, or iPod
